Capture One Pro
Capture One Pro,  Tutorials

Capture One Pro for Black and White Conversion

Capture One Pro has one of the best (if not the best) B&W conversion options of any software application to date. Here we give you a mini-sampler of its capabilities.

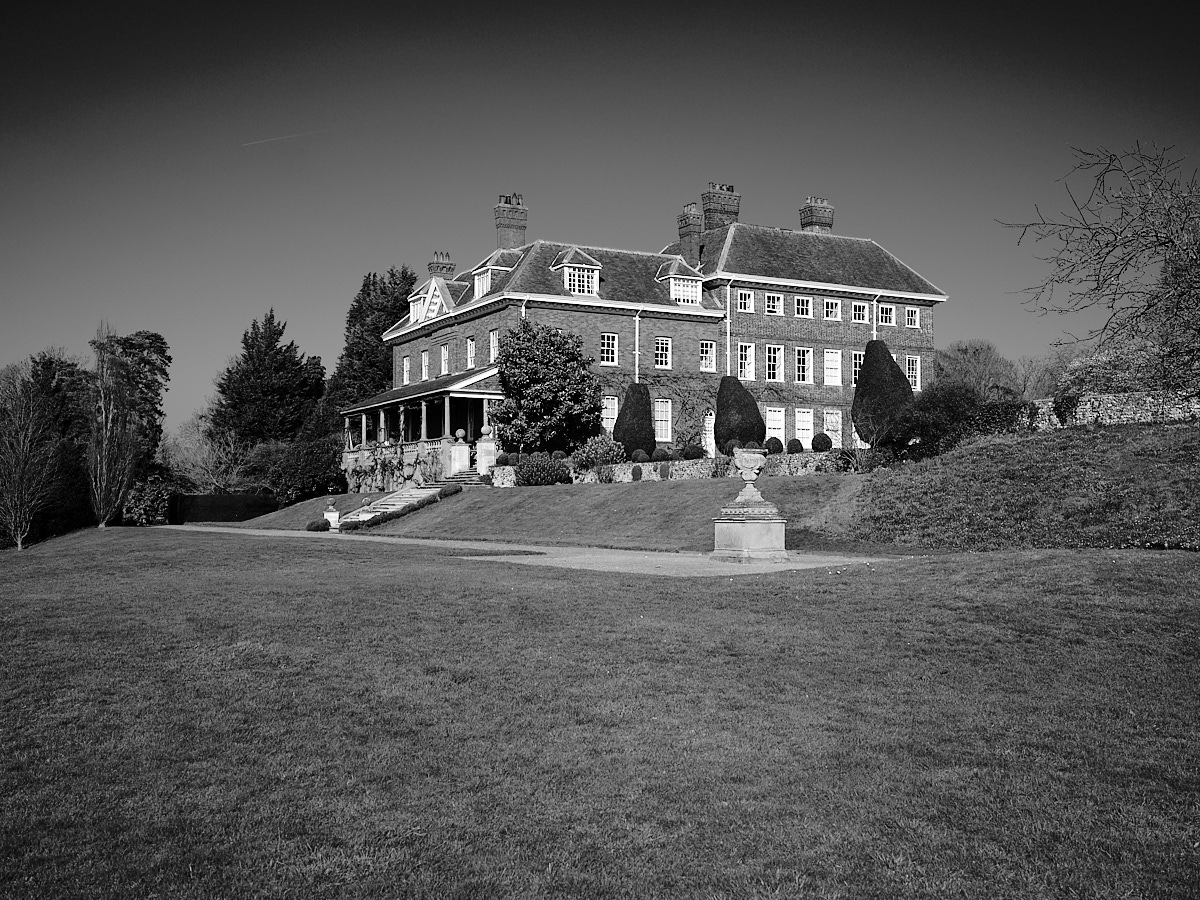
Black and white images are probably most authentic and compelling when the original image was conceived with the idea of it being in mono. Typically that means it was originally composed without strong colour influences, but that’s not necessarily so. Take the image above as an example, it was one of a series captured with the 50MP Fujifilm GFX-50R and the 45mm F2.8, equivalent to a FF 35mm, and it works well either in colour or B&W. So how do you go about creating a convincing conversion?

Capture One Pro

If you’re a Capture One Pro user you already own one of the most (and likely the most) powerful apps for converting colour images to mono. And if you’re starting the conversion from RAW it’s even more powerful than Silver Efex Pro. That’s not to say you can’t get excellent mono images from Silver Efex Pro – as I’ve written before – because you absolutely can.

However, if you’re using Capture One Pro then there’s no need for Silver Efex Pro at all, as having to make edits outside of the RAW conversion pipeline is a time-consuming and unnecessary chore – there’s no real place for it in a commercial environment.

Although RAW-level mono conversion is easy in an editor like Capture One, if you want quality B&W photographs you need to do more than simply desaturate colour and adjust the Color Sensitivity Sliders. When using Capture One there are several different techniques for quality mono photographs. The following isn’t an in-depth guide but a primer to get you started.

1 Begin conversion

Converting to B&W is easy in Capture One. All you need do is check the Enable Black & White option in the Black & White tool in the Color Tool Tab, but a straight conversion or a simple desaturation doesn’t work all that well in practice. Therefore before conversion make the usual tonal adjustments to the image as you would normally for a colour image. Although the default workspace doesn’t show the B&W Tool Tab, if you’re starting out it’s a good idea to add it as it has the most relevant tools added to it. Hover the cursor over the Tool Tabs, then right-click/ctrl-click, and select Add Tool Tab  > Black & White.

2 Adjust tone and contrast

After conversion, adjust the colour sensitivity sliders in the Black & White tool. Each slider adjusts the brightness or density of a colour range. Select the region you want to adjust in the image by colour, such as green or blue hues,  and then adjust the appropriate slider from the Black and White tool. Dragging the slider to the left darkens the region, and dragging to the right lightens it. Adjusting each of the six sliders will control the brightness of the entire image by colour range, though it’s unlikely you’ll need to use them all on any one image. Just look at the tonality in that image.

3 Finishing touches

When you’re satisfied with the result, you’ll likely need to make a few final tonal adjustments. Tweaking global contrast is usually required for the best results. This can be achieved by using the Contrast slider in the Exposure tool or preferably by using the Curves tool. If adopting the latter I recommend using the Luma adjustment curve to prevent any slight shift in colour saturation. Note some deliberate vignetting was added to the final image, one of the many advantages of a totally RAW workflow, as it’s easy to add or remove at a later date without interfering with the original.

All images were made processed in Capture One Pro (20). Download a free trial of Capture One Pro. Note although you’ll be requested to set up an account (it will take less than 5 mins) you won’t be asked for a credit card, or indeed any payment details.

Support this site

If you found this feature on Capture One useful, please consider buying a license or subscription through our links. Sales through these links may earn a commission, which helps the running of this site. When buying through the official Phase One store, please click on Enter Promotional Code and add the code ‘DJP’ in the dialogue that opens. Please also be sure to check the code has been registered before proceeding with the purchase. Please note this code will not trigger an extra discount if any is offered, but it will show Phase One that you support the work of this site. Note also that if a time-limited discount code is available you should use that discount code instead. Thank you for your support.

An in-depth guide, Working with the Black and White Tool in Capture One Pro, can be purchased from this site. Thank you for your support.

All images were made with one of my favourite medium format cameras, the highly portable Fujifilm GFX 50R and the outstanding 45mm F2.8 (35mm equivalent) prime. I also like the sound of the more accessibly priced 50mm F3.5 (40mm equivalent). Fuji’s GF 50mm F3.5 R LM WR is surprisingly compact and on the 50R it would make an excellent choice as a ‘one camera, one lens’ set-up.


B&H Photo (GFX50R kit and 45mm with $1000 instant savings)

WEX Photo (UK)