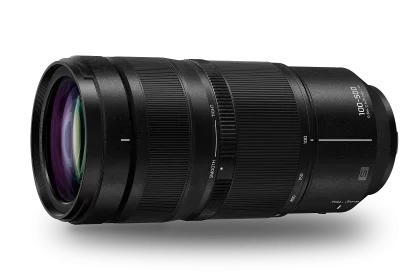
Panasonic’s first ultra-telephoto zoom for the L-Mount system is notably more compact and lighter than rivals like the Canon RF 100-500mm or Tamron 150-500mm. Ultra-Telephoto Zoom — L-Mount Pana...

How to Customise the Control Ring Button on the Canon EOS R5 (and most other EOS R models)When you set up button access to the lens control ring on the Canon EOS R5, pressing the assigned button w...

New Summilux-SL 50mm and APO-Macro-Elmarit-SL 100mm Lenses Launch with the SL3-P Leica launches two new SL lenses alongside the SL3-P, expanding its lens range with premium optics for everyday and clo...

Leica has unveiled the SL3-P, a new full-frame mirrorless camera positioned between the 60 MP SL3 and the lower-resolution 24 MP SL2-S. It uses a 44.3 MP sensor, putting it in a practical middle groun...
Step-by-Step Guide to Using Individual RGB Curves As a quick rule, you use Lightroom Classic RGB curves (individual Red, Green and Blue channels) to adjust colour balance by tonal range, and the Param...
Lightroom Classic Quick Help and FAQ Lightroom Classic is a popular and versatile photo editing and library management tool, but it can take time to learn the best workflow. This FAQ answers some of t...
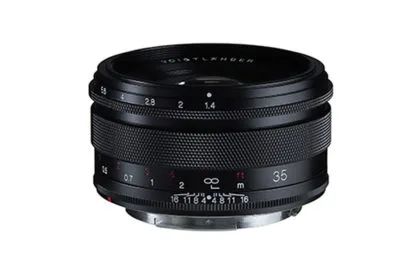
Voigtländer Expands Nokton Classic 35mm F1.4 Lineup with RF and Z Mount Options Cosina, better known as the OEM behind Zeiss’s Otus and Milvus lines and the maker of Voigtländer lenses, officially add...
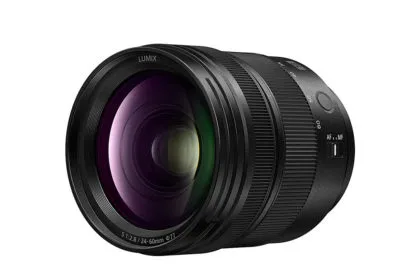
Key Features and Benefits of the Panasonic Lumix S 24-60mm F2.8 Smaller and lighter weight than a 24-70mm F2.8 One Ultra ED and two ED glass elements to minimise fringing Three aspherical elements to ...
Presets are saved sets of Develop adjustments that let you apply a specific look instantly across photos. They provide a consistent starting point you can then refine or combine by applying additional...
Technical Data Manufacturer Panasonic Model Lumix S 24-60mm F2.8 (S-E2460) Web https://www.panasonic.com/uk/ Elements/construction 14 elements in 12 groups (3x Asph, 1x UED, 2x ED), Coatings: Fl Angle...